 Home33
 home二级菜单
 home3级菜单
 Collection
 Search
 USD
USD


Home
/
ActiveAid 1218 Pediatric Rehab Shower/Commode Chair-Tilt
ActiveAid 1218 Pediatric Rehab Shower/Commode Chair-Tilt
WISHLIST
Quantity
-
Detail
Description
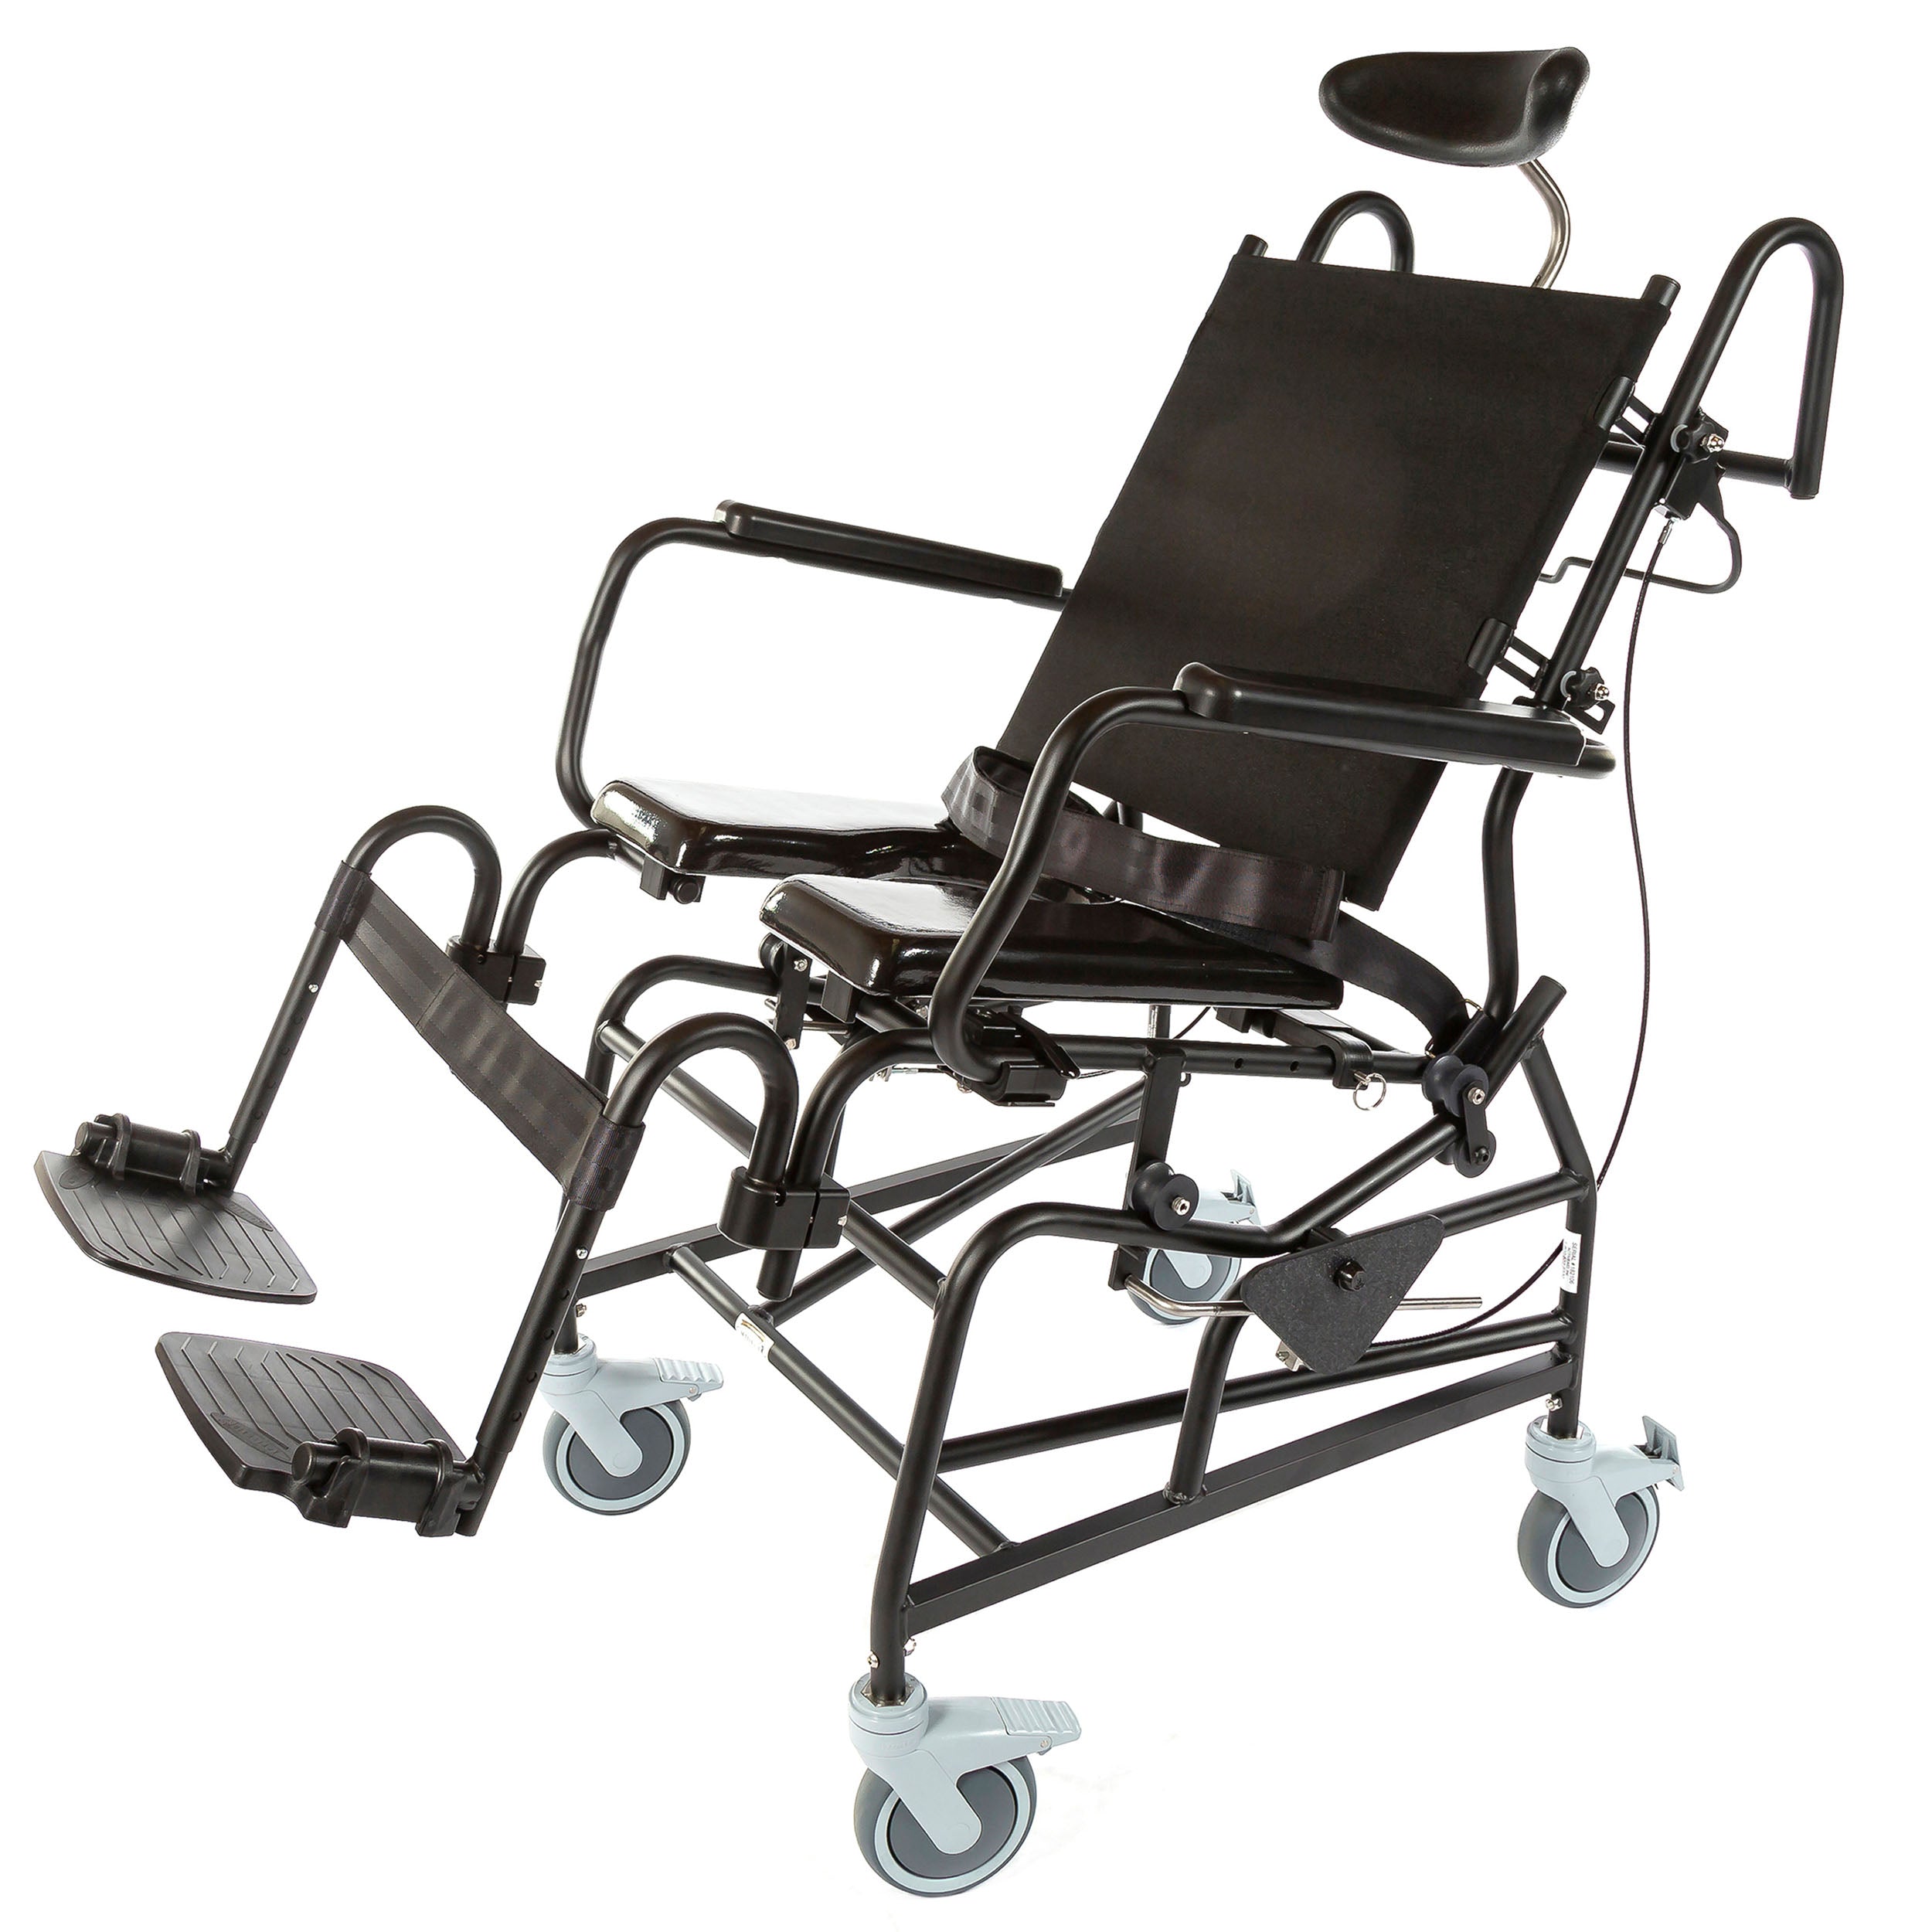
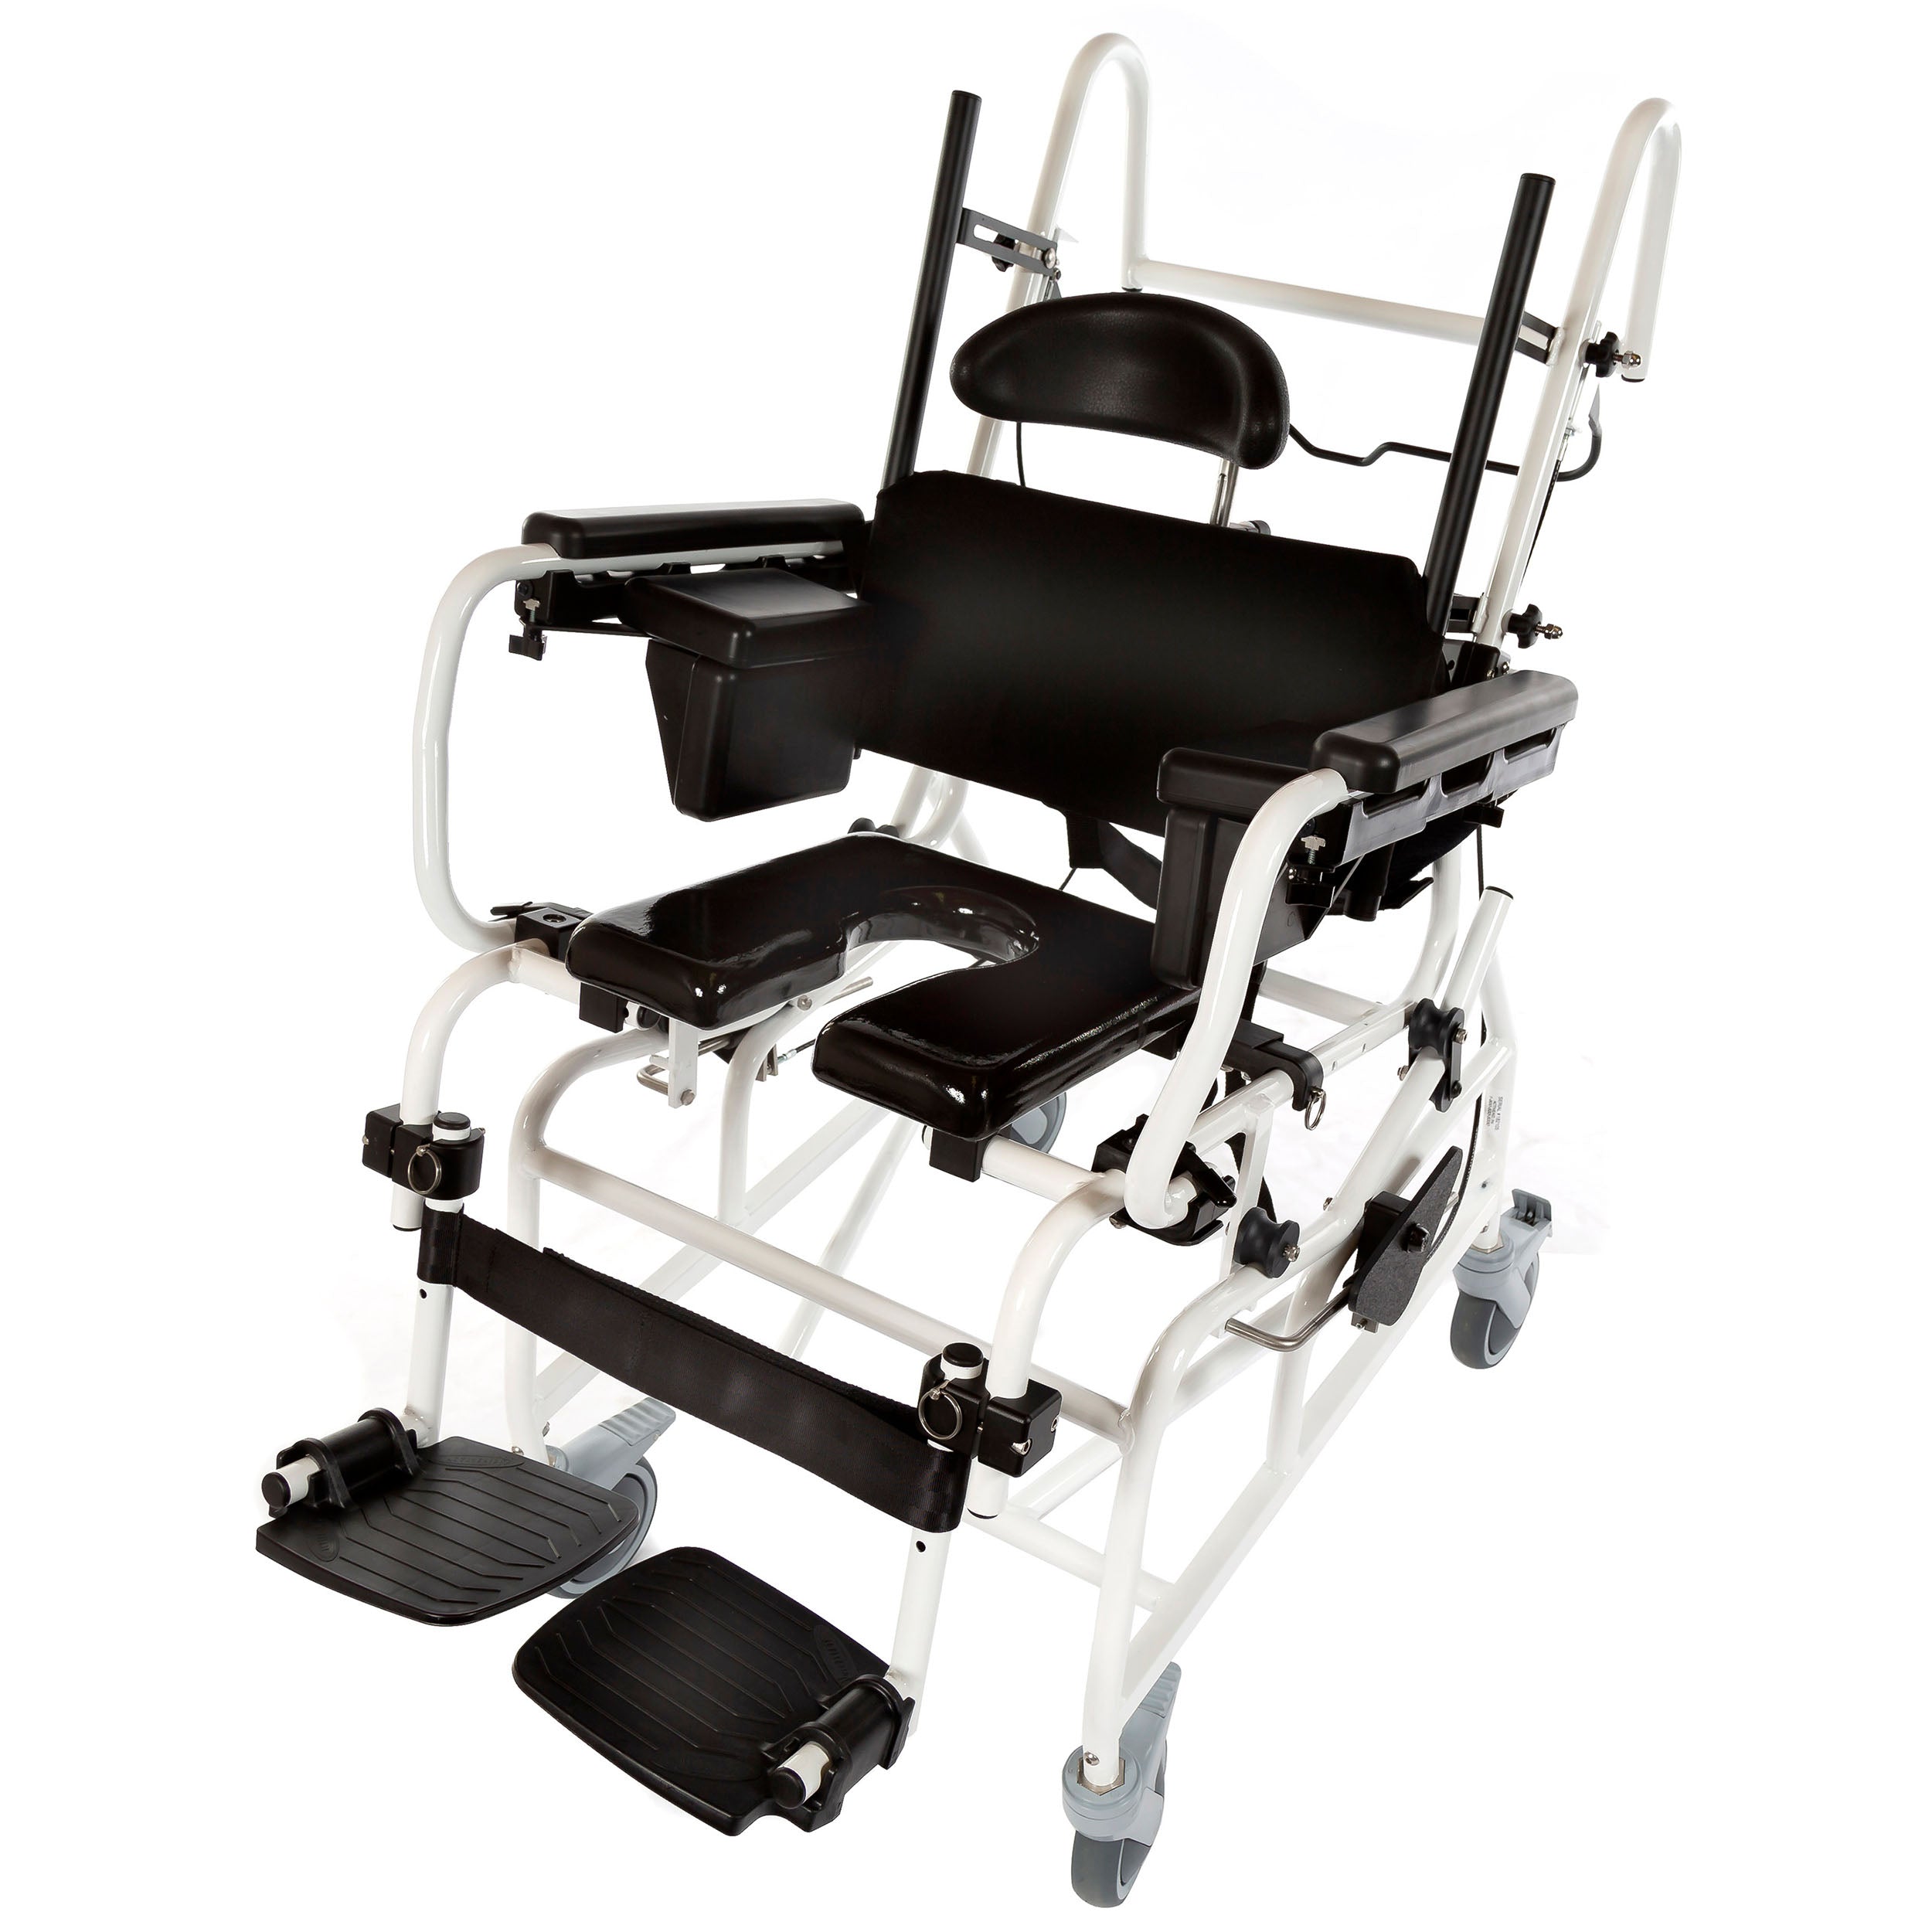
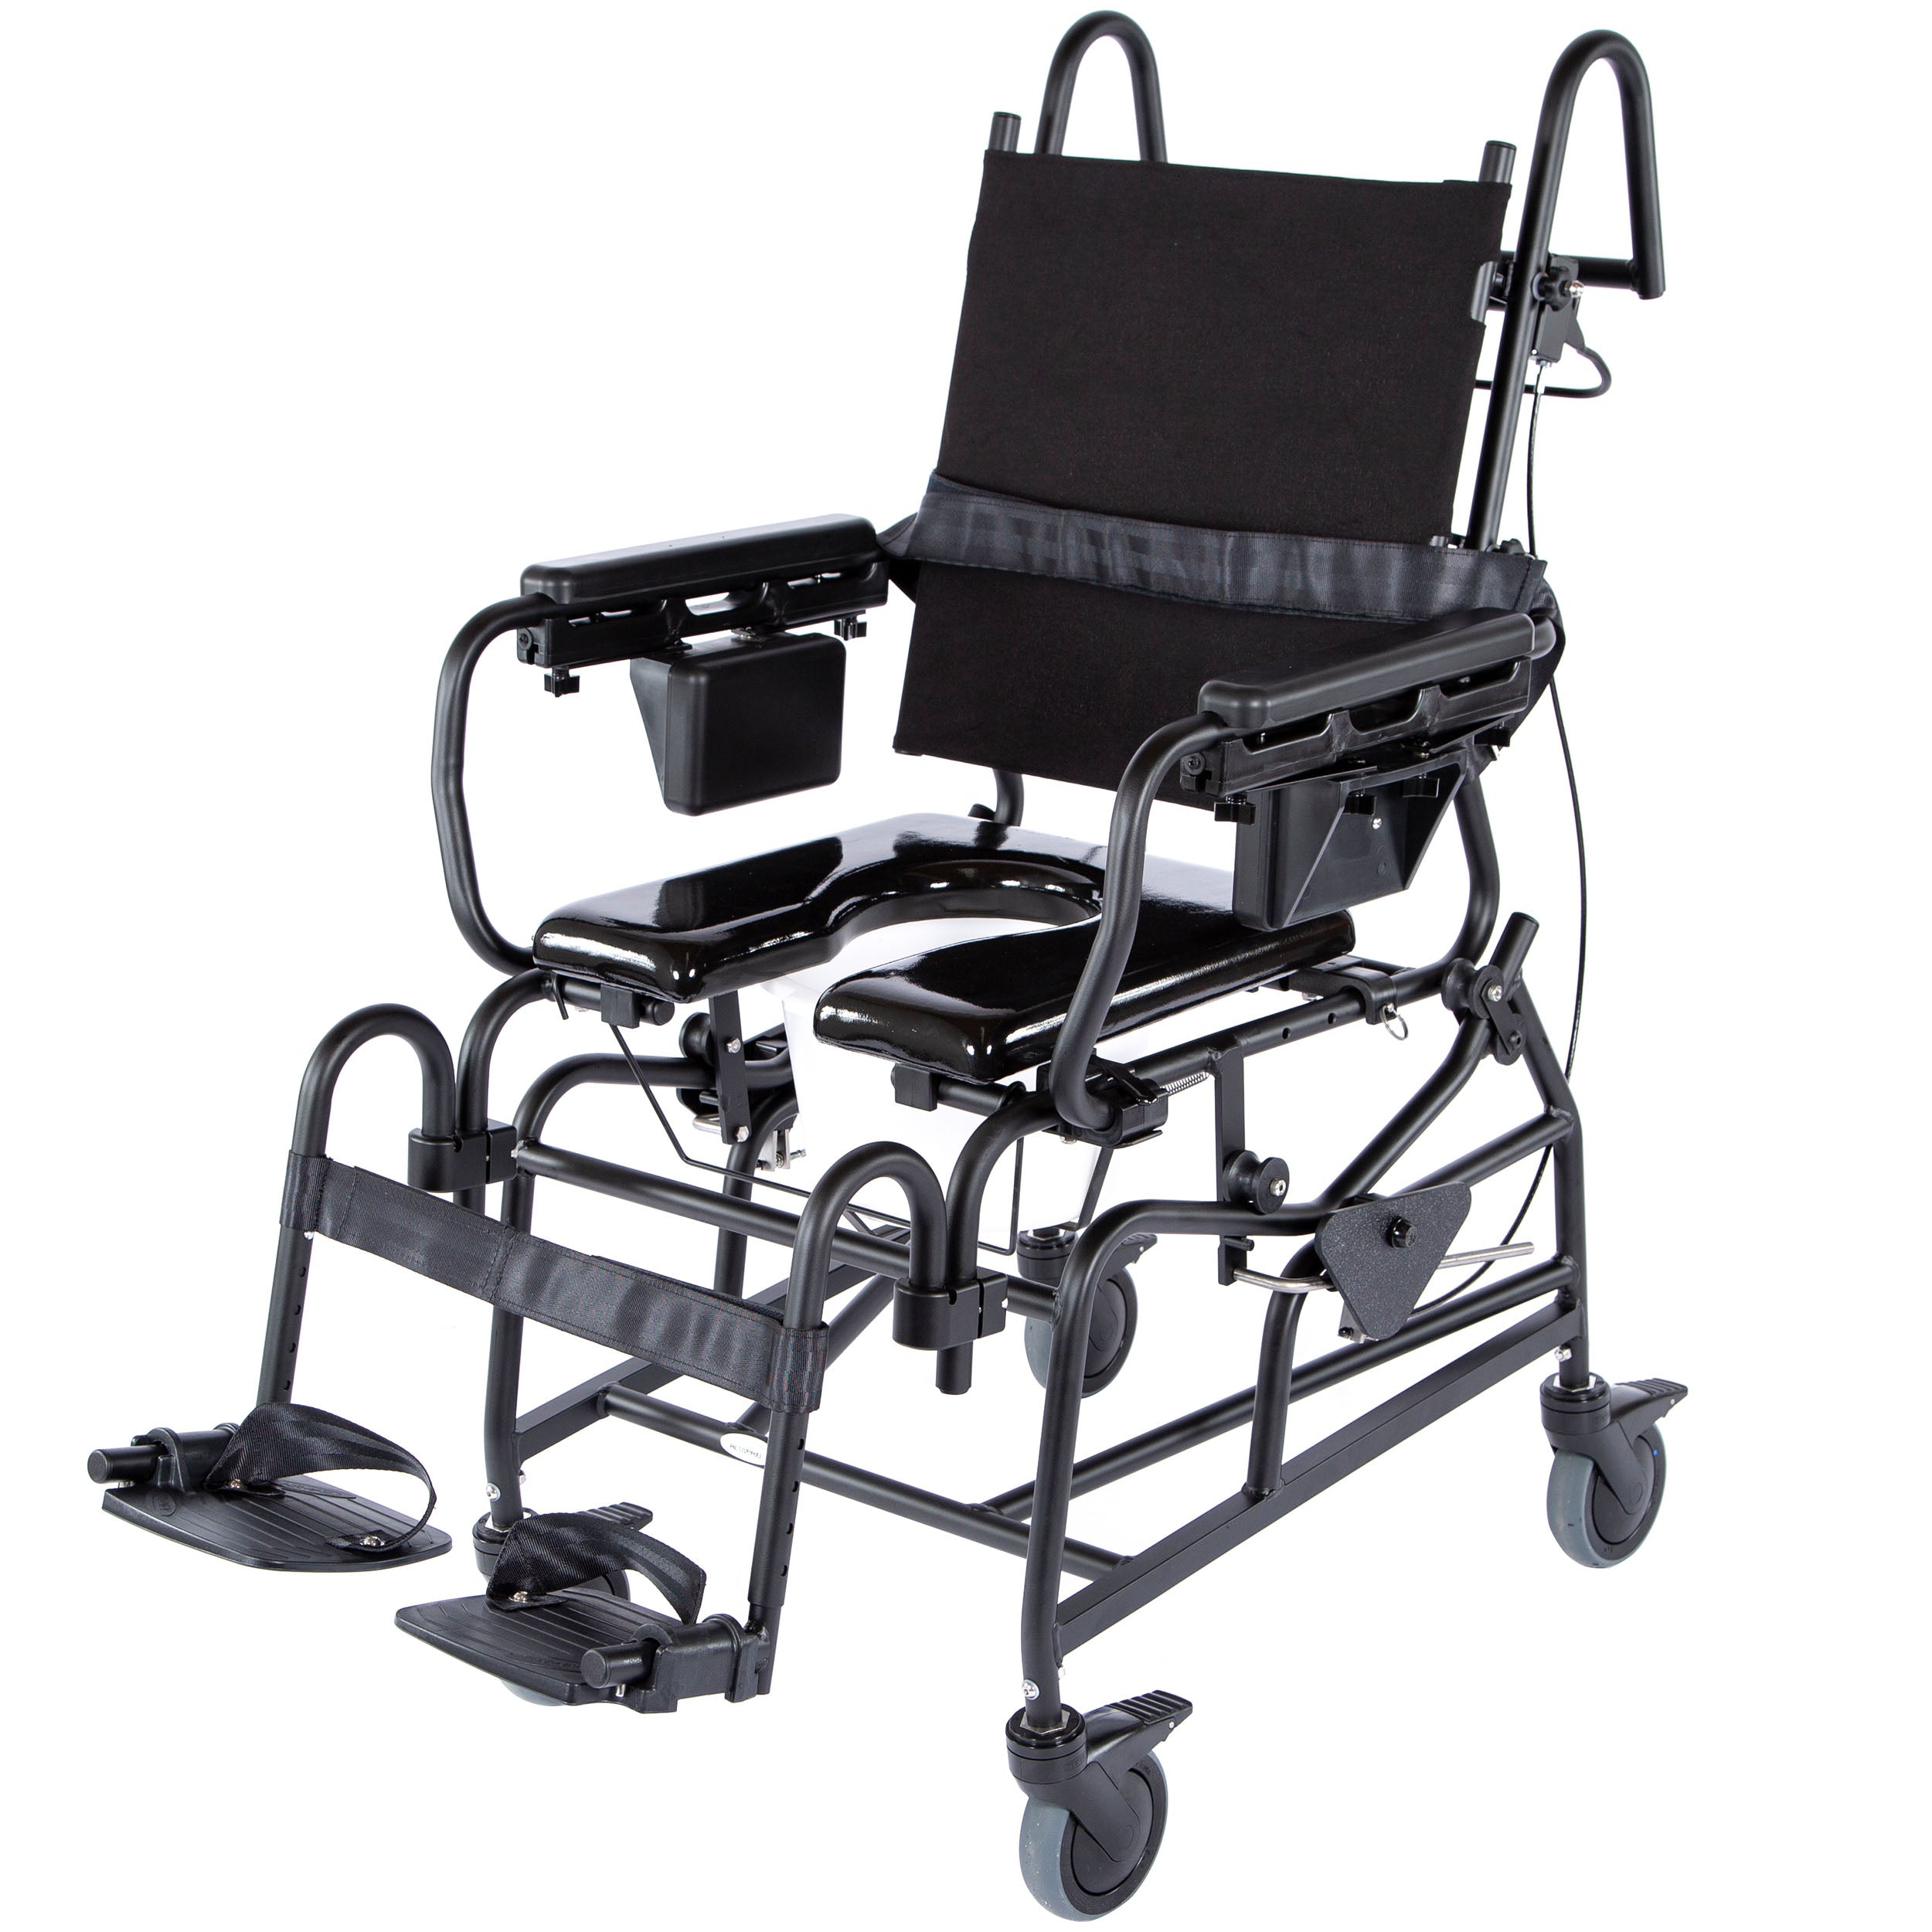
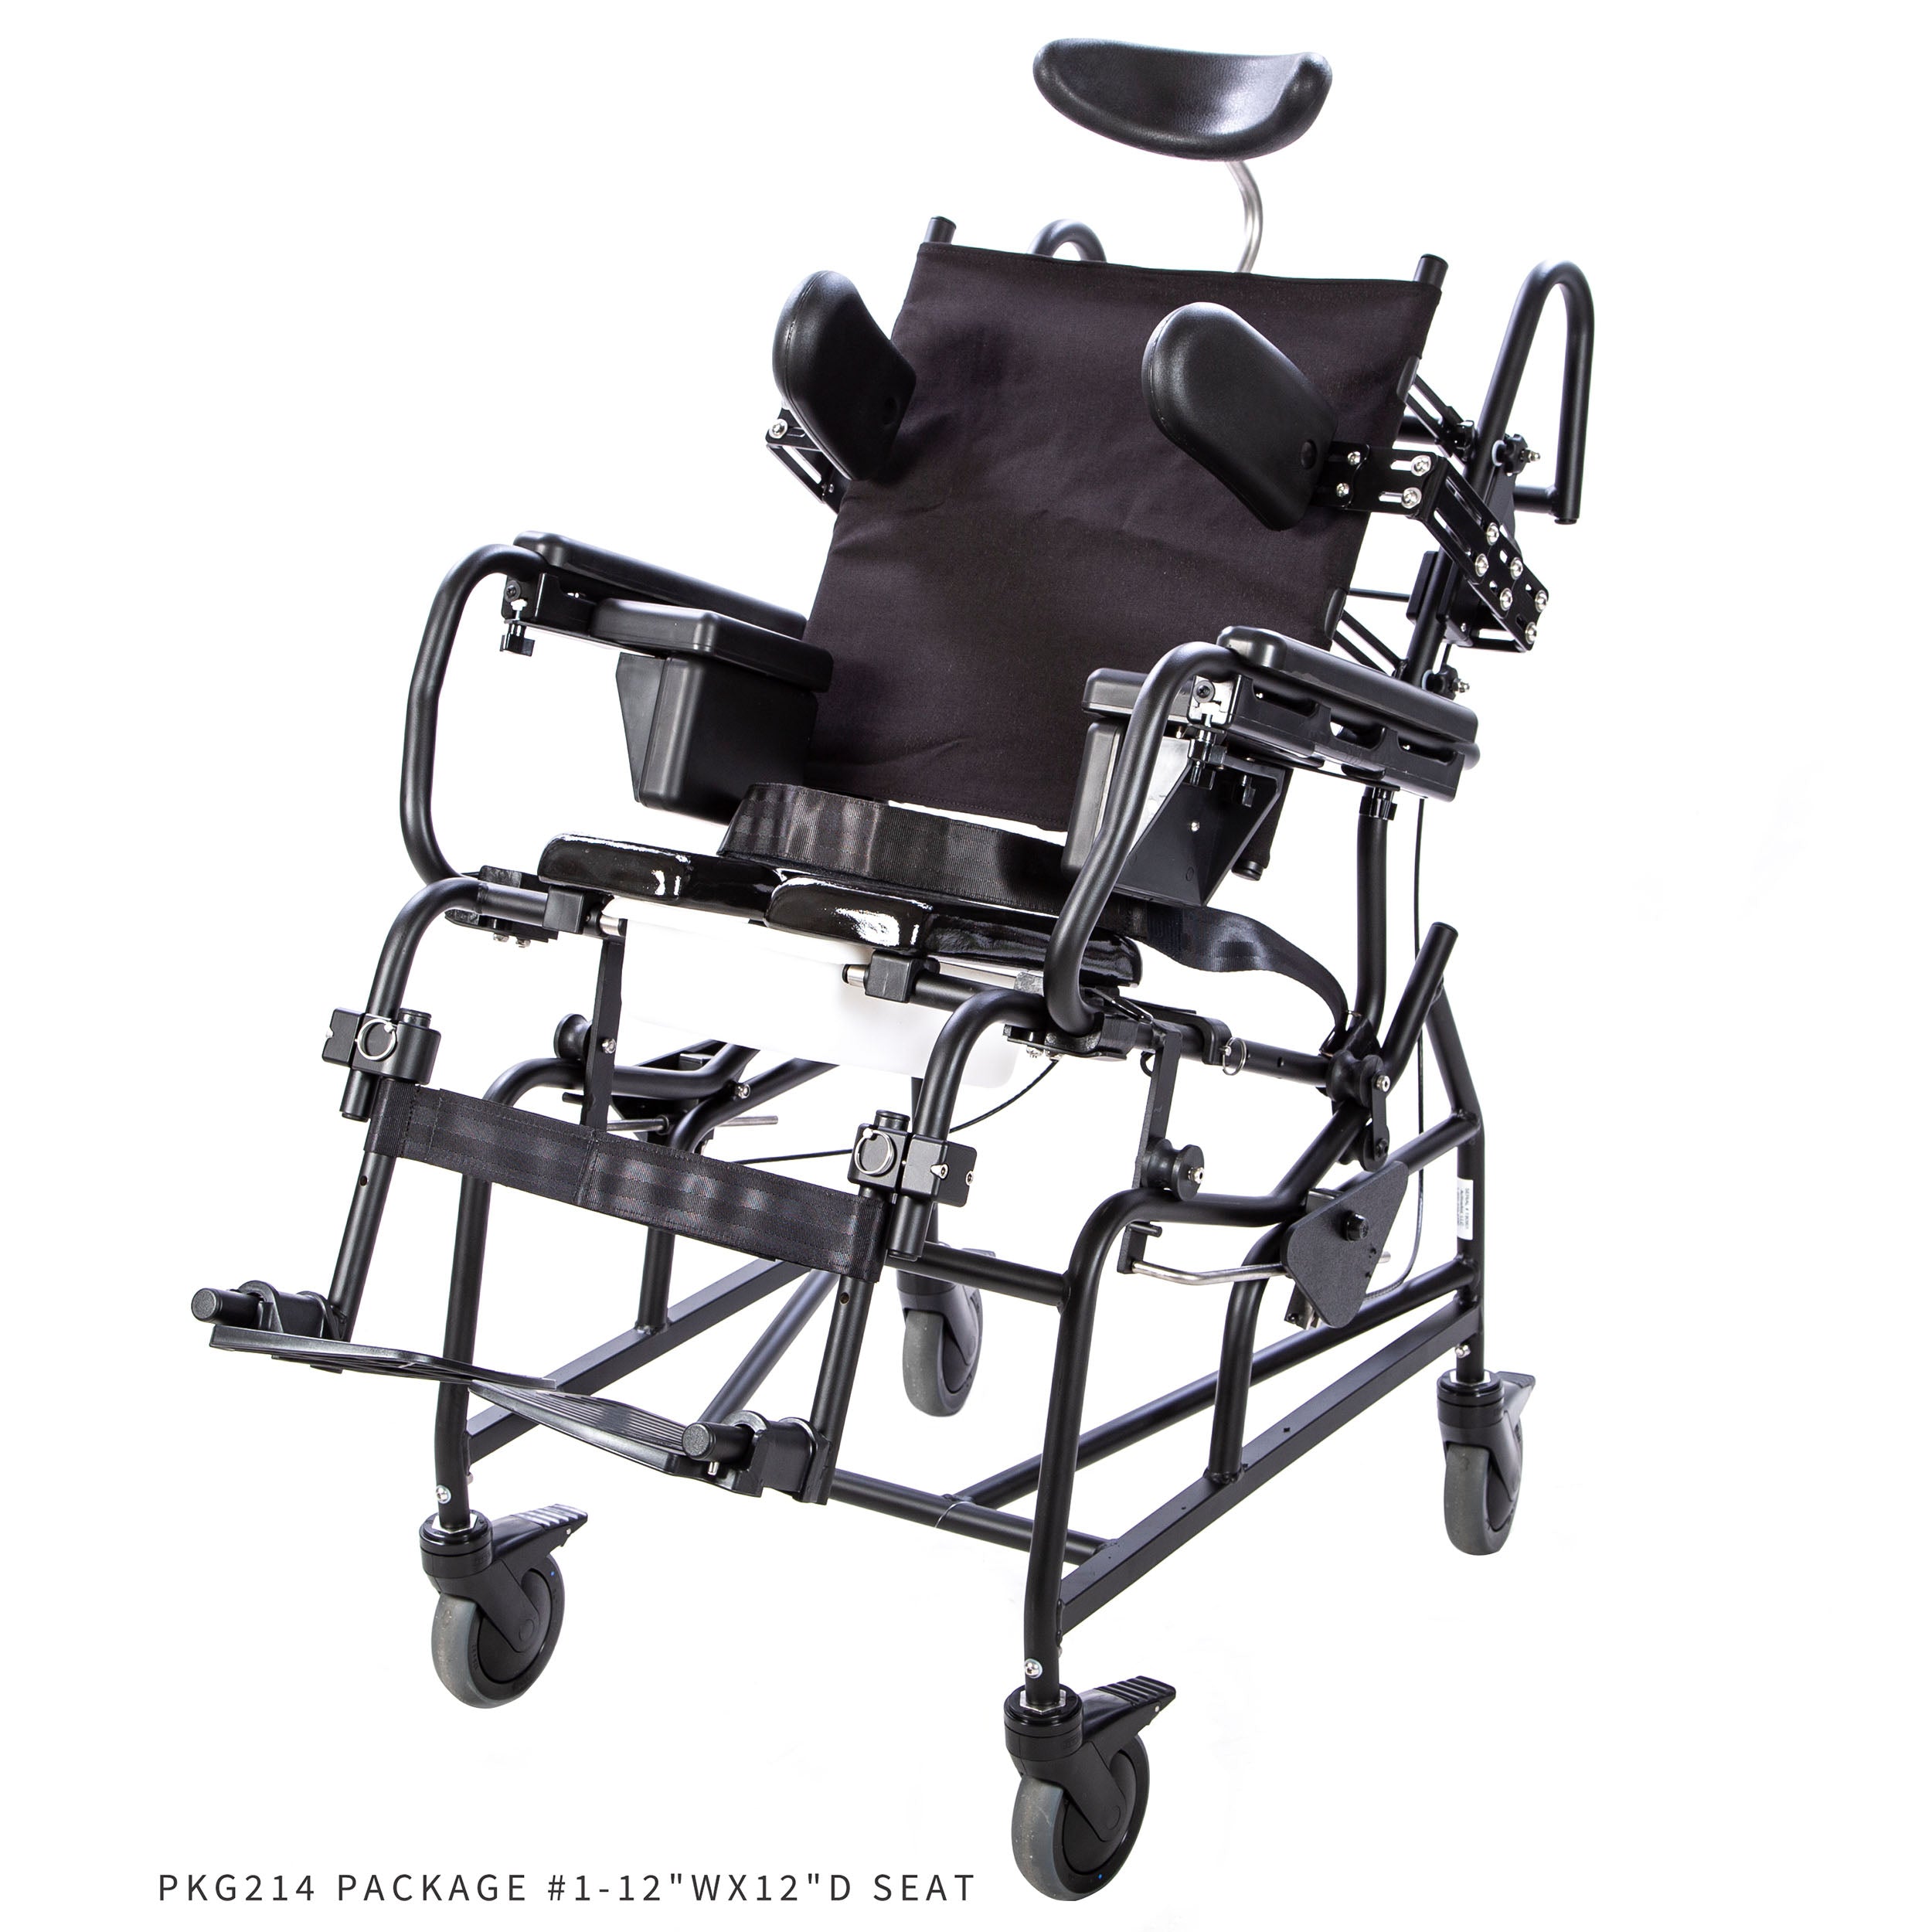
ActiveAid 1218 Pediatric Rehab Shower/Commode Chair-Tilt
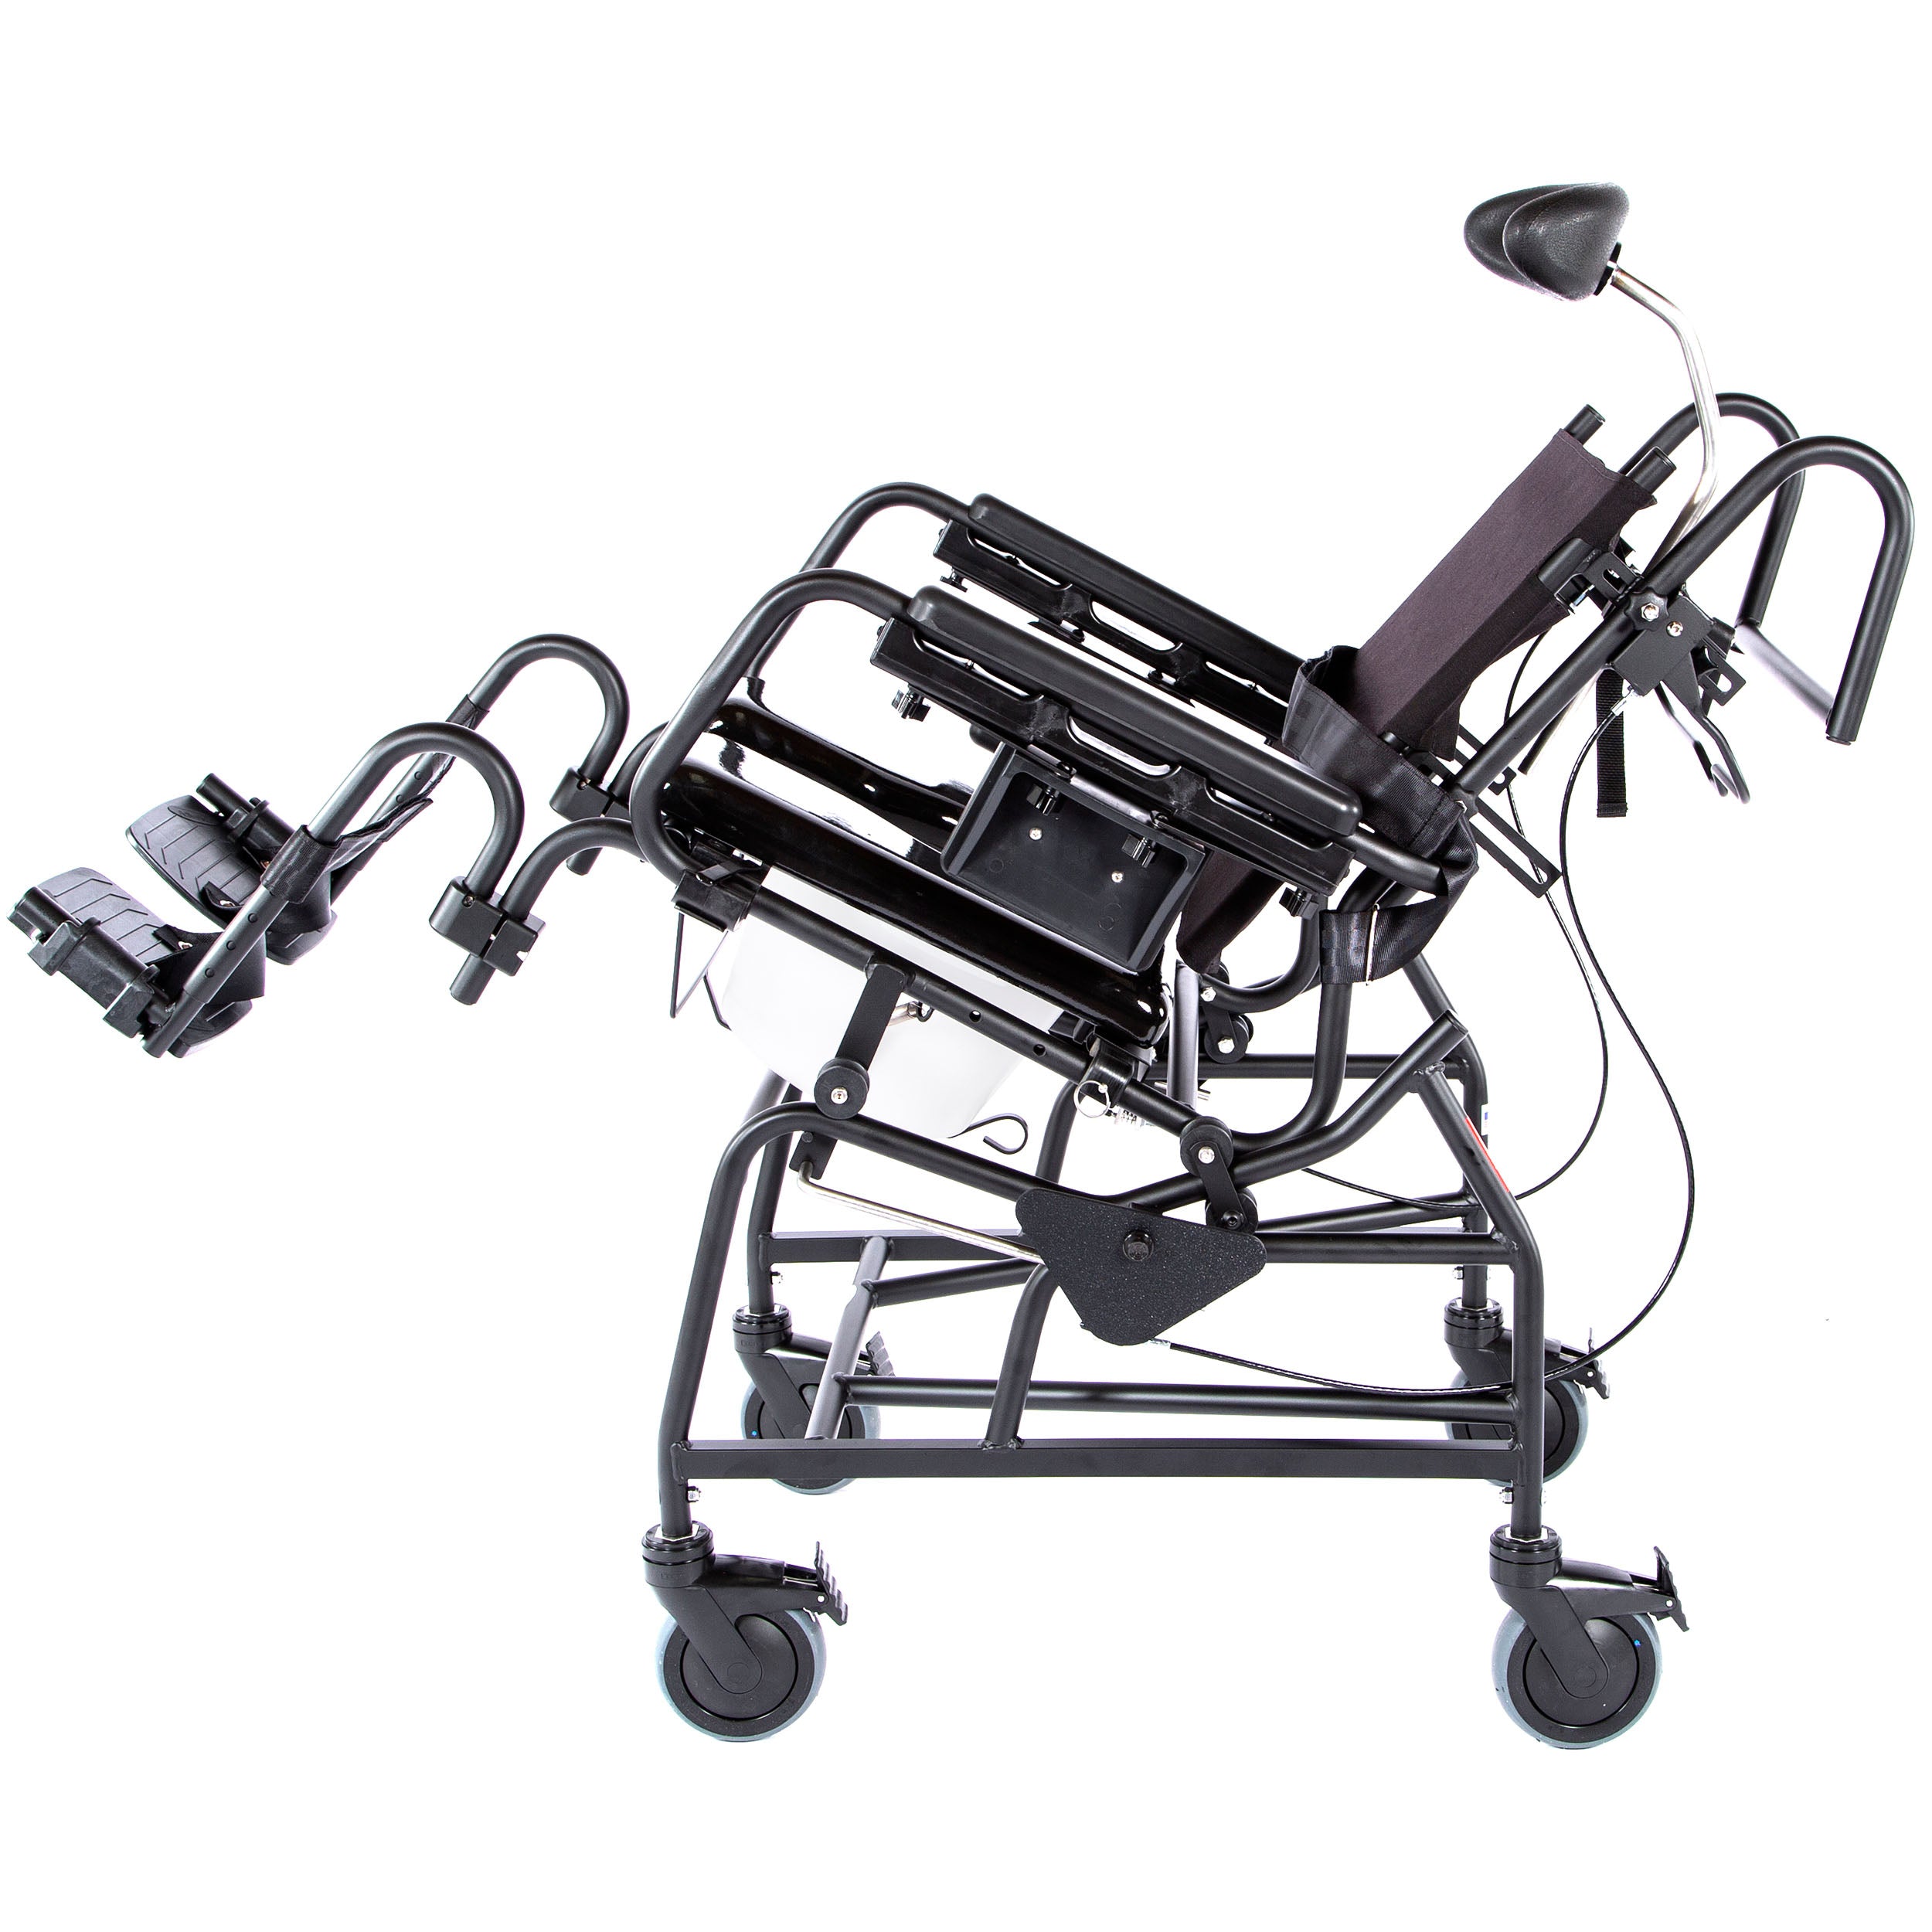
The 1218 adolescent tilt-in-space shower/commode chair was designed for years of use and with growth in mind. A single stainless steel frame and non-corrosive components can accept multiple seat width/depth combinations from 12-18" that can be easily swapped as a child grows.
The gravity assist tilt system performs infinite adjustments up to 29˚ easily, even underload. This chair can be configured for maximum support with a system comprised of the seat, adjustable depth, and slack back, padded armrests, hip guides, lateral supports and head support.
Product Video
Product Features:
- Complete Packages for Easier Ordering Available
- Single Frame Accepts All Seat Sizes
- Infinite Adjustment with the Gravity-Assist Tilt
- Easy-to-Navigate Design for Tight Spaces
- Customizable Seats, Frames, and Upholstery
- Fits Youth and Small Adults
- Simplifies Transfers
- Made for Home or Rehab
How to Use the 1218 Pediatric Rehab Shower Chair:
- Casters: Lock casters by pushing on the brake lever. Release the brake by pressing down on the rear of the brake. To remove the casters, loosen the self-locking nut and machine screw located on the chair frame. Install the caster flush with the frame. Re-install the screw through the holes in the chair frame. Do the same for the second caster.
- Seat: Raise one corner to remove. To install, verify the seat is even with the frame. Once verified, snap the seat into place.
- Gooseneck Legs Rests: Change the height of the leg rest by pressing the button and placing the footplate up or down until you find the right height. To remove the footrest, lift the gooseneck and displace it from the receiver.
- Elevating Leg Rests: To change the height of the leg rest, press the button and slide the footplate until finding the correct height.
- Adjustable Sling Back: Undo buckle to lower tension. Then, tighten the buckle to increase tension.
- Height-Adjustable Arm Rests: Raise the arm by pushing up on the armlock cap and move the entire armrest. Lower the arm by pulling the front armrest downward until the arm latch locks onto the stud underneath the arm pivot.
- Flip-Up Arm Rests: Shift the arm lock lever away to raise the arm. Lift the armrest. To fully remove, press the button and remove it from the armrest.
- Head Support: Loosen the ratchet handle to change the height of the headrest.
- Tilt Function: To adjust the tilt-in-space angle position of the device, lift the lock release handle which will release the locking function. Push down or lift up on the handle on the back to tilt the device into the desired position. Release the lock release handle to lock and secure the device in place.
- Arm-Mounted Hip Guides: Adjust the forward/rear position by loosening the front or rear knob and
- Swing Away Adjustable Laterals: Move the lateral back out of the way, press the button, pull the lateral back around behind the back. Make width adjustments by loosening the screws, sliding lateral right or left in the bracket to the desired position. Tighten screws afterward.
- Abductor/Deflector: Place deflector into the front opening.
- Hook and Loop Fasteners: Separate the belt strips by pulling them apart. Adjust the straps to the desired position. Position the strips against each other to connect them.
- Snap Fit Buckle: Unbuckle by depressing the two spring arms on the male side and pull or slide to it from the receiver. Buckle by placing the male end into the female receiver until it is secure.
Maintenance:
- Check belts for damage such as tears, cracks, or other damage.
- Visually inspect upholstery for damage.
- Double-check all fasteners.
- Use only official ActiveAid replacement parts. Use of other parts may void your warranty and/or damage your device.
- Inspect the chair weekly to guarantee it is in safe operating condition.
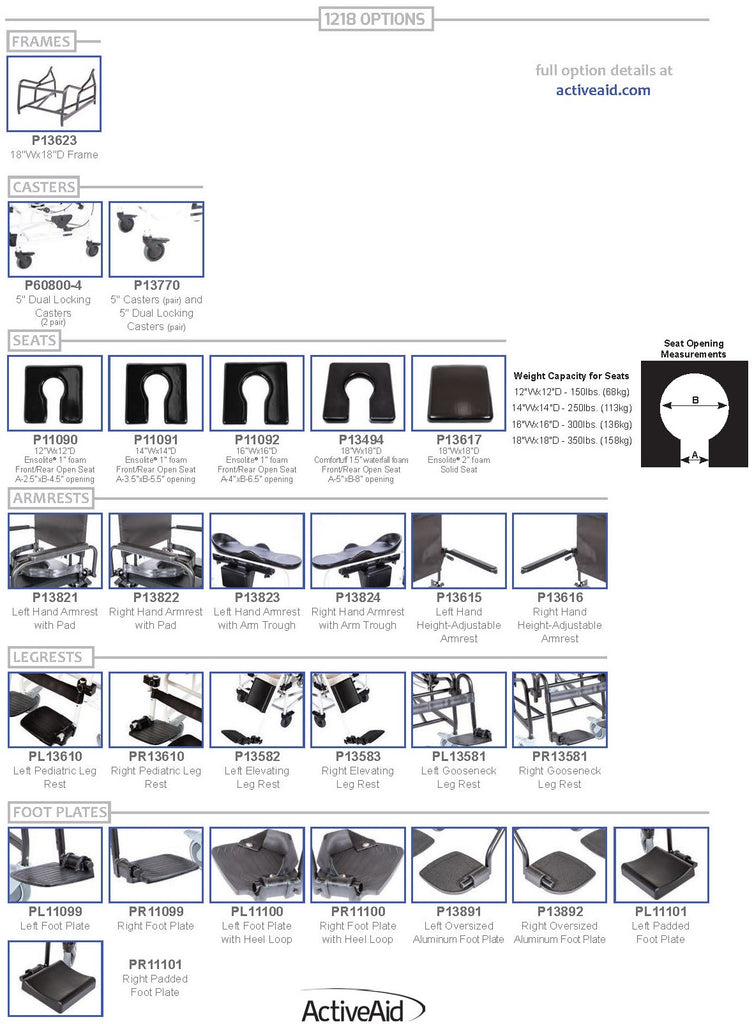
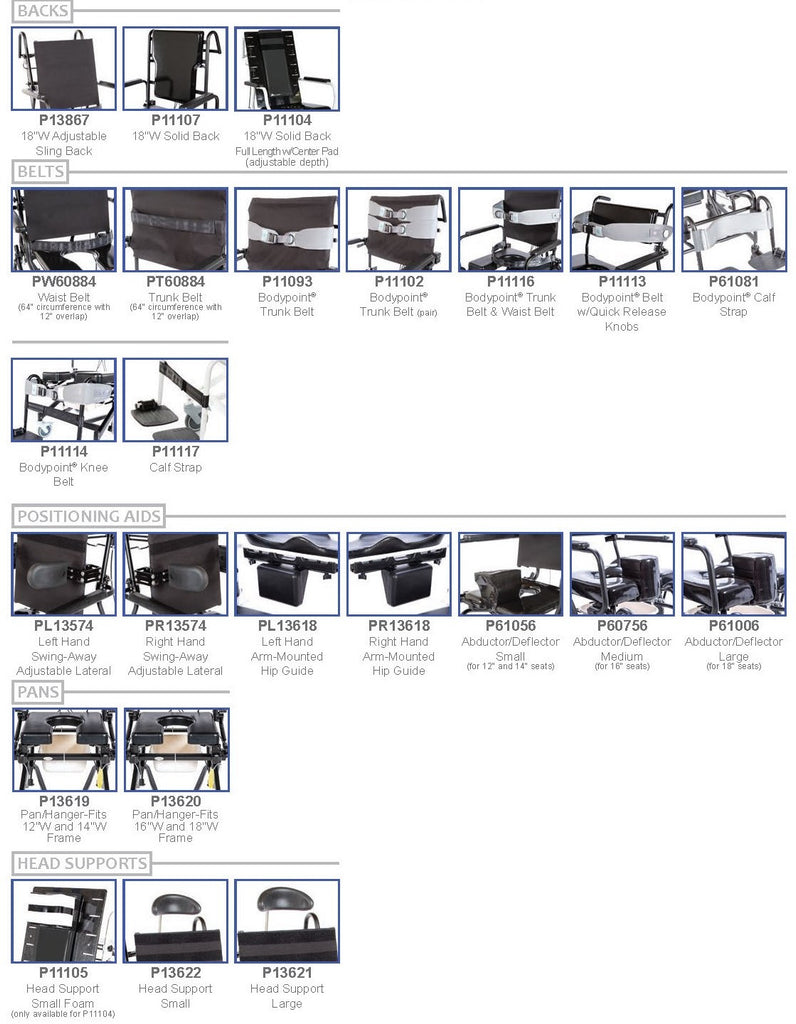
ActiveAid 1218 Shower Chair Product Options:
Extended Product Information:
-
Customer ReviewsNo comments